Hope that everyone is having a wonderful week.
First things first. The uber-talented Tracy of pipnmolly now has a blog! Tracy's artwork is incredible and now we all can enjoy getting to know the amazing lady behind the treasures. Not to mention you can see swimming elephants when you pay her a visit! Great stuff!
Just a few pictures for you to wade through before we get to the reason you're here. Non-lung-eating-patina-recipes as promised! Still hoping that one of you may have the know how to explain how to put the recipes on the sidebar with a fancy little button that will open up the page whenever you want to acess them without sorting through an entire old post.
I know how to get html code for photos, is it the same for text? PLEASE ANYONE? How about those of you who know blogger coming and going. C'mon, do a good deed- help out the tech challenged. Thanks so much in advance. See, that's positive thinking in action.
This is what I've listed in my etsy shop since my last post.

Dancing by Moonlight beneath the Sparkling Stars Duex- sold

Sunset Turkoman Goes Modern Duex- sold

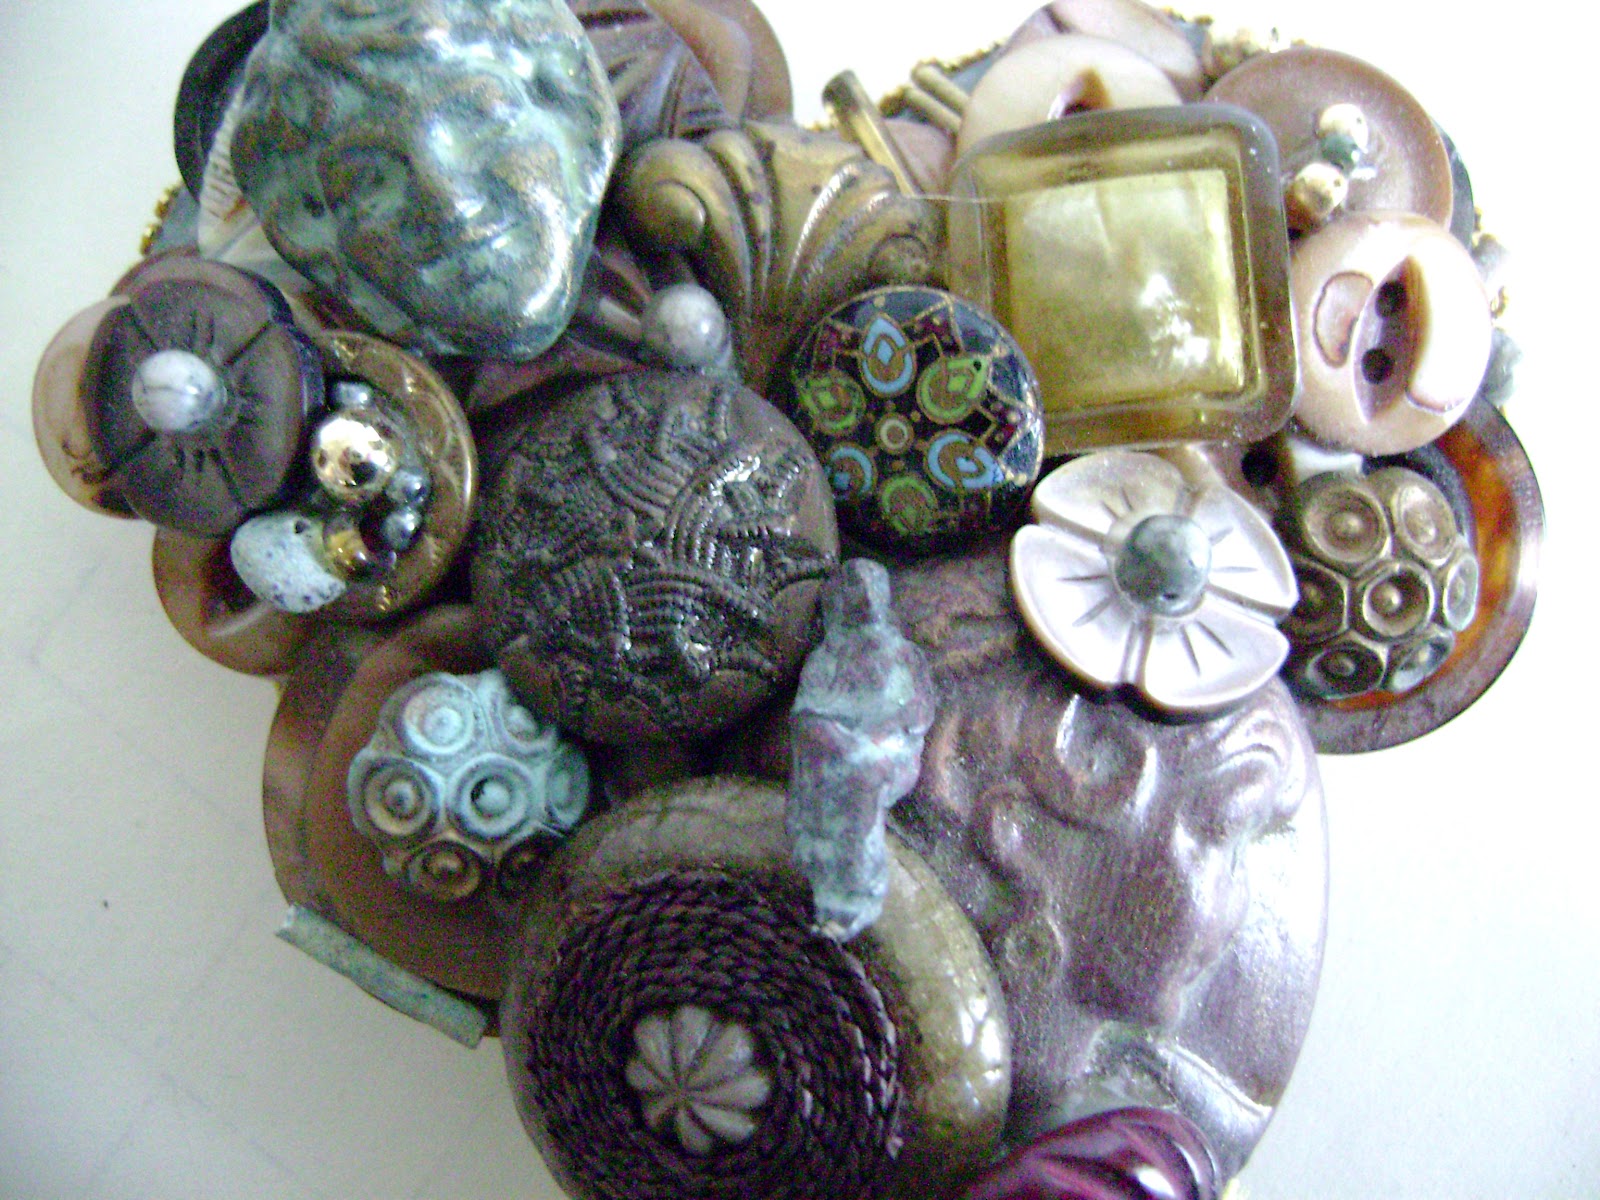
Romantic Moon Garden's Evening Embrace
I've long dreamed of having a moon garden. A quiet place to relax and drink in the beauty of the white blossoms that open at twilight filling the night air with their sweet aroma. In the darkness, also trying to make out the shadows of those blooms that are at their brightest during daylight hours and that fade seamlessly into the night. That was the inspiration for these earrings.

Raw silk texture brass hole in one bracelet with a champagne colored stick pearl toggle closure.

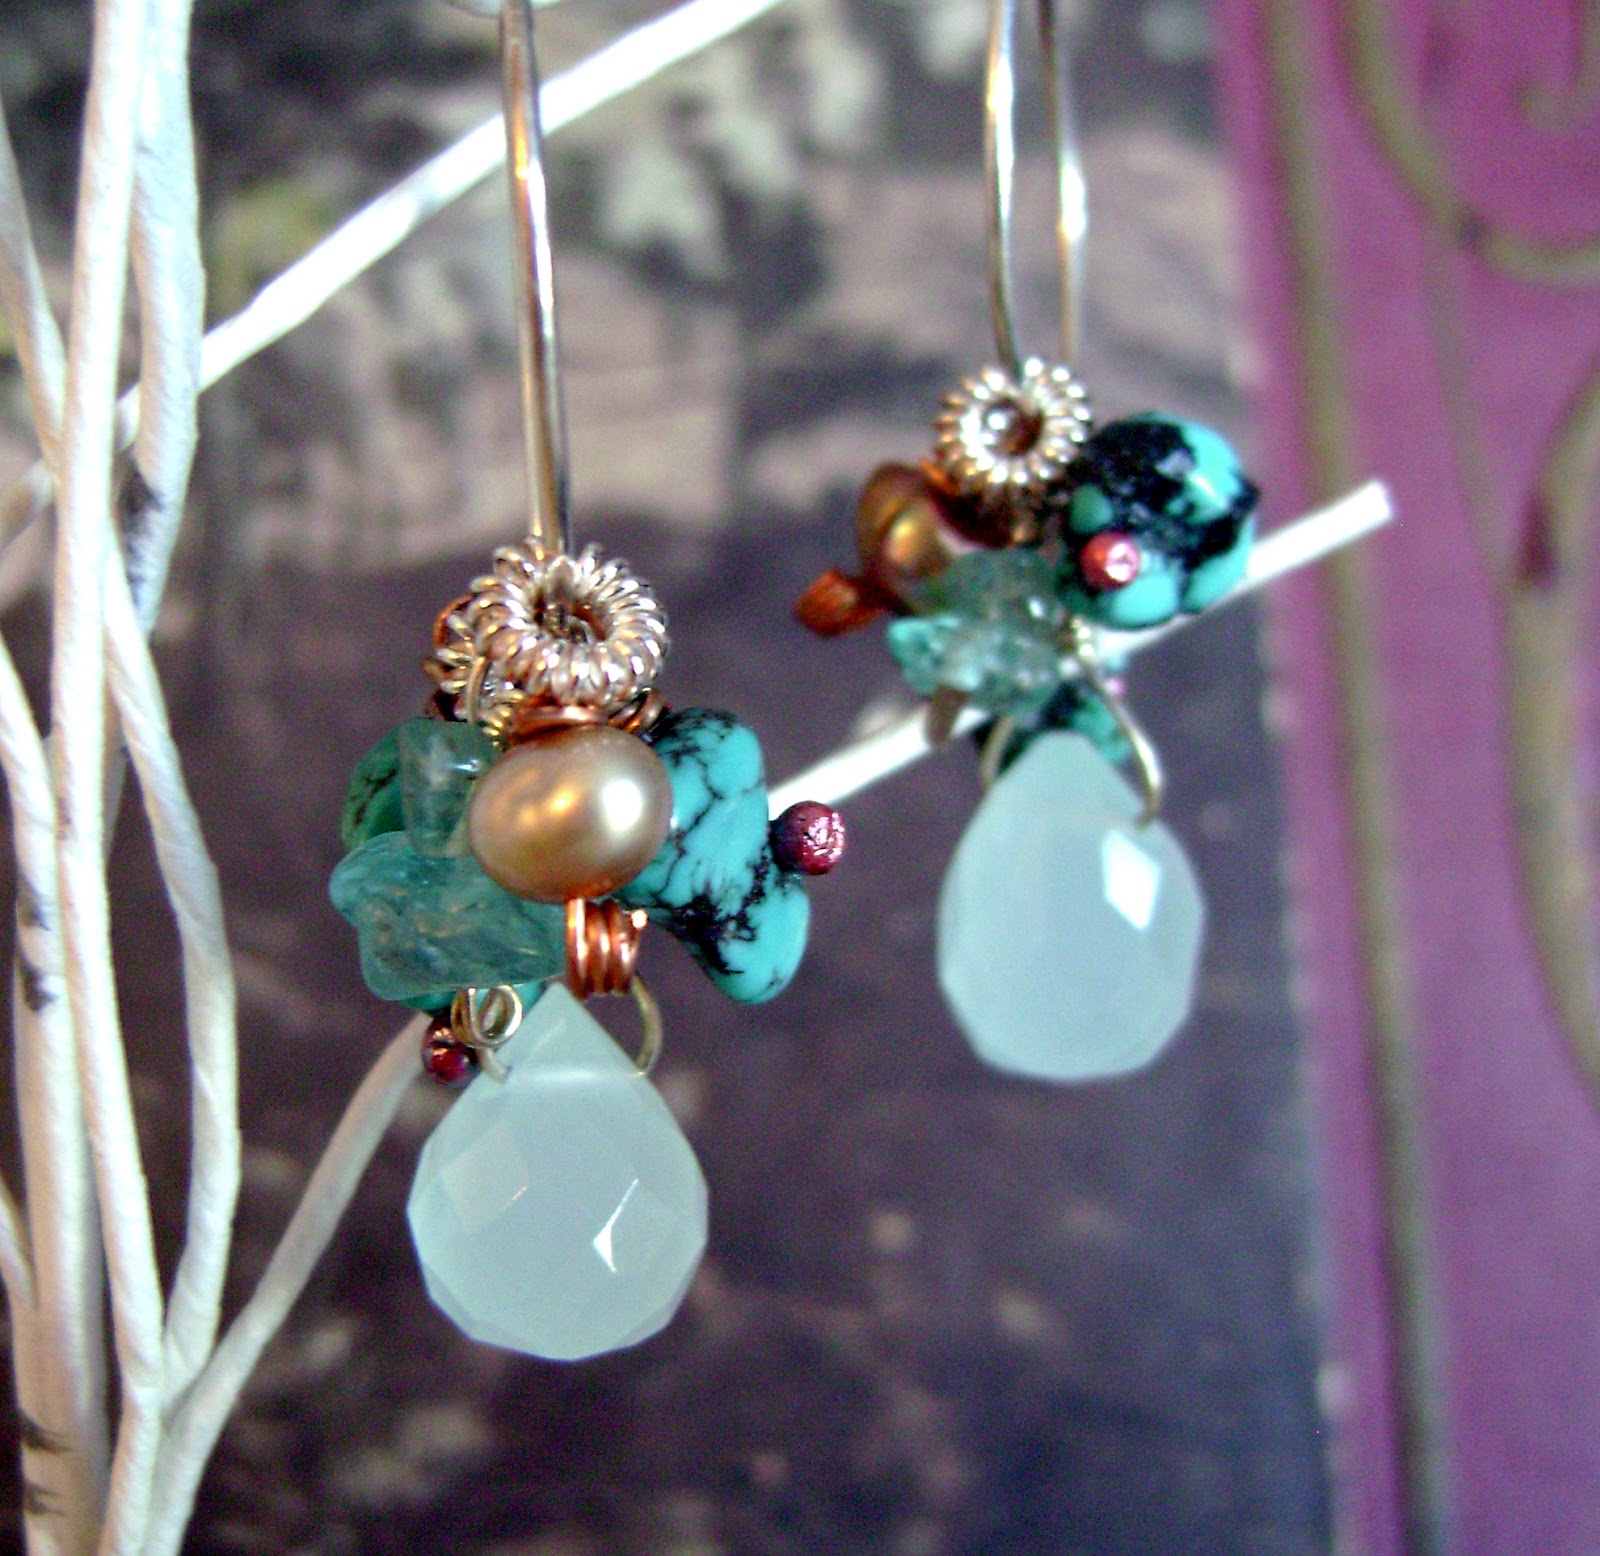
Rustic oxidized crystal twisted hoop earrings
A few other things got listed but you've seen them before, so I'll spare you.
A few months ago Kim of Flotsam Tide fame and I were discussing alternatives to the usual chemical varieties of patinas. These are most of the recipes I share with my students in class. I sent them to her and she suggested that I put them on my blog. So finally, here they are! There are many many others, but these are the basics. Here are my sample photos of pieces that have been colored with common oxidizing agents and also those I've done with the alternate recipes. This is by no means an exhaustive list, just what I like to use.

Liver of Sulphur on copper sheet

Liver of Sulphur on copper wire

Liver of Sulphur on textured copper and patterned brass (with enameled headpins)

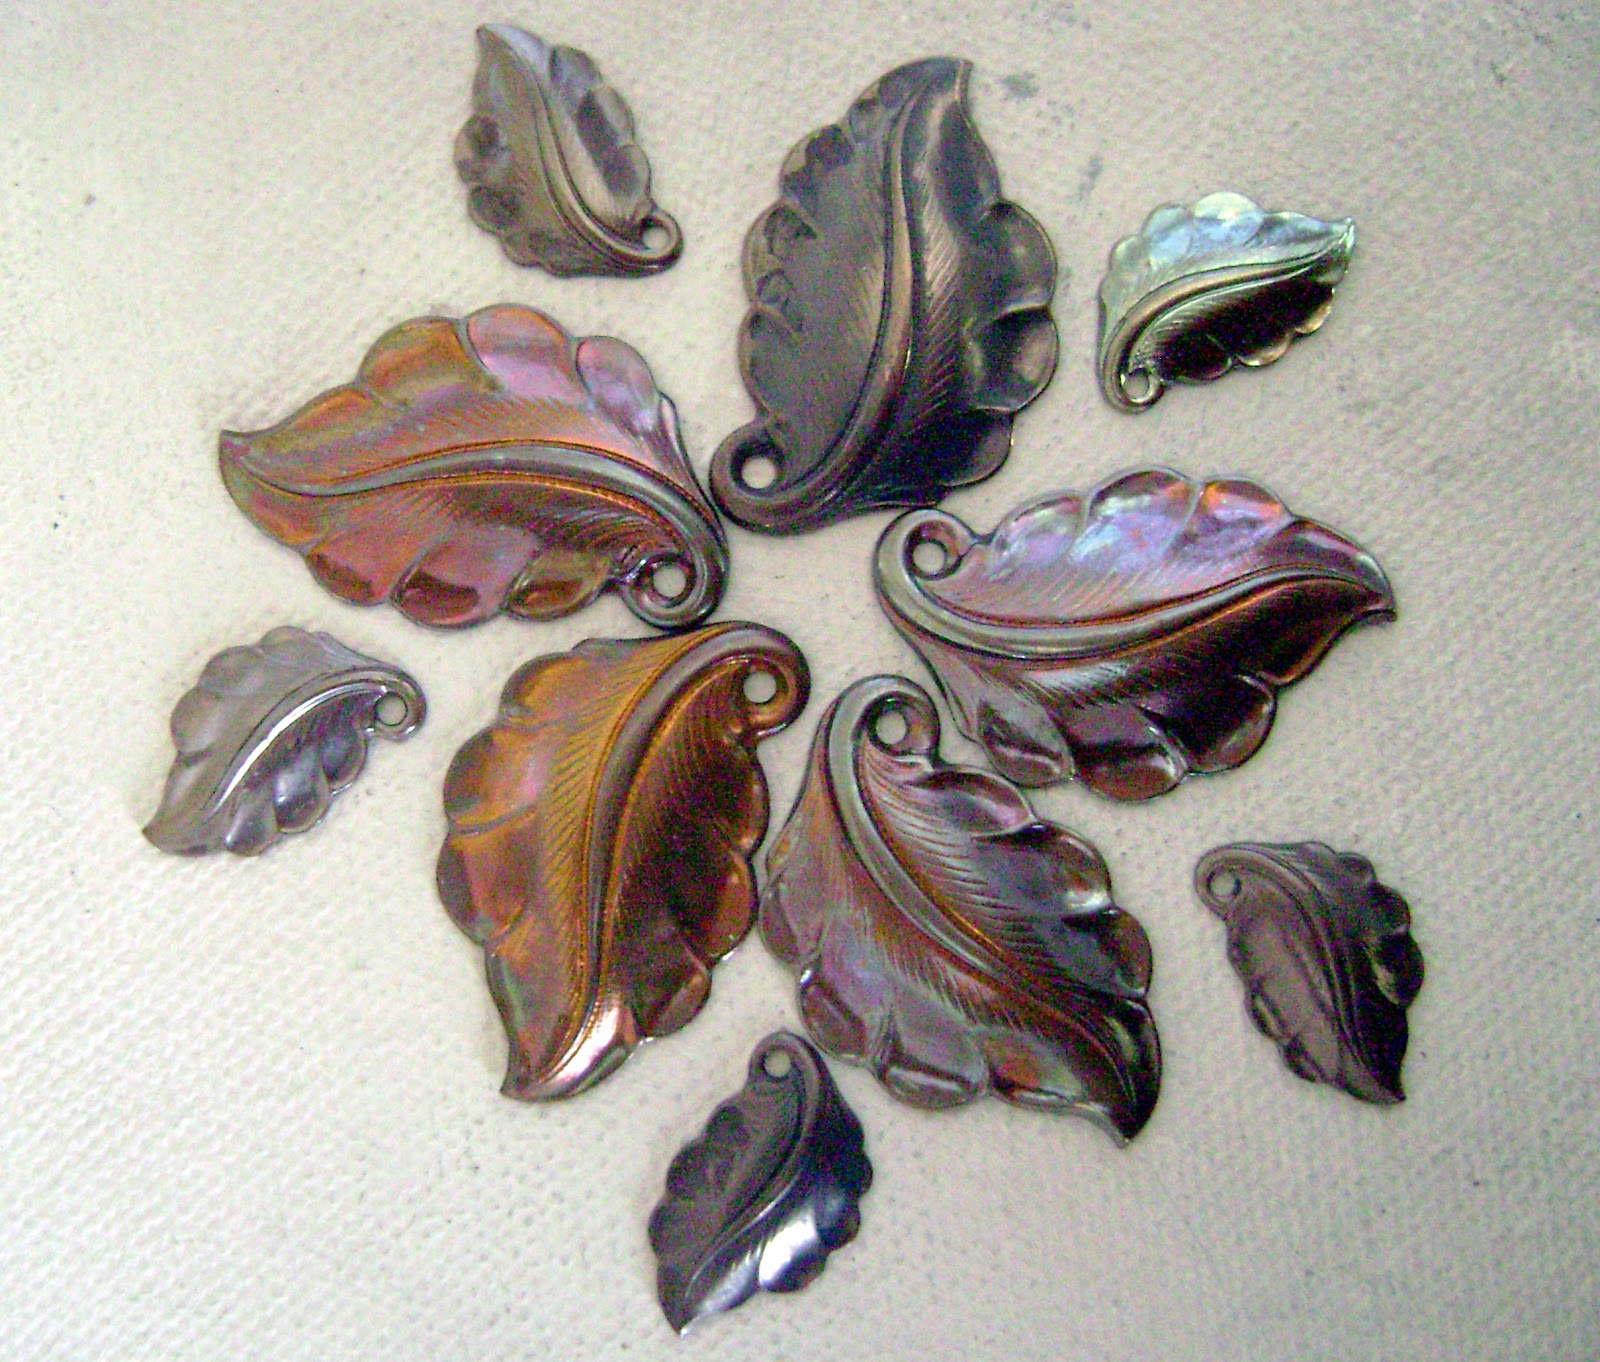
Repetition for emphasis....this is brass that has been torched. If you're fast with the torch you get colors but if you want it really dark, just let it get to the glowing orange stage. This is my fav blackening process. Quick, clean and doesn't irritate my lungs with nasty chemicals. Course the drawback is that it only works on components not on a finished piece. Well, I guess you could torch a finished piece if you were so inclined but..........

sealed with a spray metal sealant

Novacan black. I don't know why I did that thing with the papers. (Unless it's cuz I was afraid I would be brain dead and not be able to recognize the patina used in the less than fantastic photograghs.) I do know I'm not going to reshoot all of these photos just cuz it looks ridiculous. Let's all pretend it's not there. That's what I'm doing.

Woohoo, you get this photo twice in one post.
The pink ball-head pins that make up the center of the white blossoms, are achieved by making, then immediately quenching copper ball-headpins in hot water.

Some more Jax Pewter Black.
Which as you can see, works on a variety of metals equally well.

Gilders paste which comes in numerous colors.
On the window and door of the "We're Not in Kansas Anymore" necklace, I've layered white Gilders paste over the vibrant red and blue colors to soften and age them.

Acrylic paint patina on raw and heat patinated brass.

Alcohol inks on raw brass

Prismacolor colored pencils on copper

bigger but not clearer. This technique works well on textured metals.

Prismacolor pencils on reticulated copper.

Enamel on copper, pennies and brass. Enamels are not thought to adhere well to brass, but I haven't had any issues with this brass filigree that I torch fired enamels onto. All of these pieces were torch fired. From the delicate copper wire headpins to the thick copper hardware fitting.

Foldformed copper with torch fired enamels

Jax Green on heat patinated copper and brass.

Jax Green on foldformed, heat patinated copper and on brass leaf stampings soldered onto brass.

Flame "painting"- heat patina on copper. Done with a torch.

Fume patina

Sawdust patina

Salt water soak and an oven.

Steel embedded in concrete that has been rusted with repeated salt water applications.

Potato chip patina
THAT'S ALL FOLKS!
That's a pretty good sampling of what you can do to color metal easily.
Well, to be accurate, that's all the pictures. Now come the words you all love so much.
Here's the recipes and safety suggestions. Nothing fancy and in no particular order.
Please observe safety precautions when working with chemicals. Here's a very important rule to remember when working with any type of chemicals.....
Do what you oughta, add acid to water.
Never add water to chemicals. It can bubble or foam up or even do bigger scarier things.
Atmosphere affects the reaction and results of applied patinas. It is hard to duplicate results.
I get the most beautiful irridescent flame painted effects on copper in the autumn when the air is cool and dry.
You must remove lacquer or other protective finishes from the metal prior to applying patinas.
Wear a respirator if you are spraying any chemicals or natural patinas. If working indoors, which is not recommended, ventilation is very important.
RECIPES
~Basic recipe:
Mix:
2 cups of white vinegar
1 1/2 cups non sudsy ammonia
1/2 cup kosher or sea salt (more salt=more green. Less salt=less green)
Mix until salt is completely dissolved. Can spray or dip metal into the solution.
~Fume patina:
Dip an item in vinegar, sprinkle w/ salt then put it into a container w/ ammonia. Close and seal the lid.
I use a plastic deviled egg container. I put ammonia in the spaces for the eggs then lay the metal pieces on a shelf that I made from thick screen or mesh. You want the metal to be suspended above the ammonia so that the fumes create the patina, not direct contact. You can also have a small open container of ammonia sitting inside the larger container that holds the metal pieces.
When happy with the results, (which can take up to 24 hours) rinse the metal and dry.
~Sawdust patina:
Bury metal item in sawdust or pet bedding that has been dampened or saturated w/ vinegar. Sprinkle w/ salt. Cover. Wait an hour or so and check. You can also use ammonia in the mix.
Fine sawdust=fine mottling. For more color add lots of salt.
You can let the pieces dry in the sun preferably before rinsing to let the patina adhere better.
Try coffee grounds or shredded paper instead of sawdust.
~Potato chip patina:
Crush salt and vinegar potato chips into a container. Bury metal pieces in the chips then spray with water. Let sit for up to 24 hours. Rinse and dry.
~Wiping bleach onto copper will remove the shine and dull and age the finish.
~Baking salt water soaked brass in an oven will age it. The temperature of the oven and length of time you leave it in the oven, will depend on how dark you want the metal to be. You may have to repeat the process a few times to achieve the desired results. 300 degrees is a good temp to begin with. Lower or increase as needed. Experiment!
~You can also get lovely, reddish heat patinas from copper heated in a 300 degree oven. (no oil involved)
~I like to torch my copper and brass to achieve a dark base color before I apply other patinas.
~When flame painting or heat patinating, the most dramatic colors often develop on the opposite side of the metal that you heat with the torch. But not always. These results are extremely dependant upon atmospheric conditions.
~Colored pencil patinas:
I like to use this technique on textured metal. I also like to preheat it to darken the metal a bit, let it cool, then apply the oily colored pencils. Oil pastels also work well for this technique. Apply the colors, heat from the backside, apply more colors. Repeat, building layers of colors. An electric mug warmer may work to keep your metal warm enough to melt and blend the colors nicely.
~Liver-of-Sulphur patina:
Add a few drops of ammonia for an irridescent effect.
~Dusty blue-green patina:
Mix:
Red wine vinegar and Miracle Grow plant food. Start with a tablespoon of vinegar and stir in as much Miracle Grow as the solution will hold (a teaspoon or more).
The Miracle Grow supplies the ammonia which provides the blue color.
This can also be done with salt instead of Miracle Grow for a nice green patina.
Miracle Grow can be mixed w/ water in stead of red wine vinegar for a bluer patina.
~Oil metal then torch it, outside of course. It will smoke, create a stinky fume and possibly flame up.
~You can paint on or apply resists to the metal before applying the patinating solutions for specific designs.
~The following are things you can do to rust steel or alter metal. DO NOT USE OR MIX THEM TOGETHER! Apply them seperately to different pieces of metal or completely clean the metal between applications of different solutions. *Use all safety precautions when using chemicals, eye protection, gloves (nitrile), a respirator, etc.
Degrease your metals first, then apply:
"Off" mosquito spray
Swimming pool acid
Bleach
Vinegar
Lemon juice
*Pool acid- hydrochloric acid, used weak
*Muriatic acid- (pool acid) will clean then rust steel. Apply with a cloth. If you are diluting it, add acid to water.
Torch metal, cool, then soak it in toilet bowl cleaner
"The Works" cleaner, sprayed on metal
Brush mustard on metal. Let it sit a few days, then rub oil onto it or dip it in oil. Will have a nice reddish brown color.
Never heat metal that has had chemicals applied to it. This can produce fatal fumes.
There are so many fun things to do to apply color to metal. I would love to see photos if any of you use these suggestions.

Blue Springs, Florida
A little something to clear our heads from all of that serious info. If that sparkling clear spring water doesn't do it, then.......we've got a bad case of fried brain syndrome. Only ice-cream cures it btw.
Hey did you all notice, not a single flower photo in this whole post? Can you believe that the bulbs are almost played out in the middle of April?! That's a shocker. Of course having a freeze last night didn't help.
Remember those cool nails that Petra sent me? I made them into earrings. Love them! Wanna see?

These aren't for sale. Keeping these babies for myself. In fact I wore them all day yesterday and absolutely love them.
THANK YOU PETRA!!
You might be wondering about the results of my roller printing with those cool low relief patterns from rolling mill resource that I shared with you last time. Didn't have time to work with them yet. Can you imagine? Hoping to have some nice patterned metal to show you next time.
Hope you're all having a great week!

Looks like he got a whiff of some of those ammonia fumes. Poor thing.
You guys have to admit, he's kind of cute.
Hasta La Vista